03 Jul 2026 · projects, electronics, arduino
HTL Weiz Electric Go-Kart
Before there was all the software and AI stuff, there was a go-kart. That was my final project at HTL Weiz, Fachschule Mechatronik, class 4AFME, way back in 2021. Together with Philipp Freisinger who did the entire mechanics (thx again for that :) ), while I took over the electronics / software. Supervised by Herr Quinz and Herr Zorn.
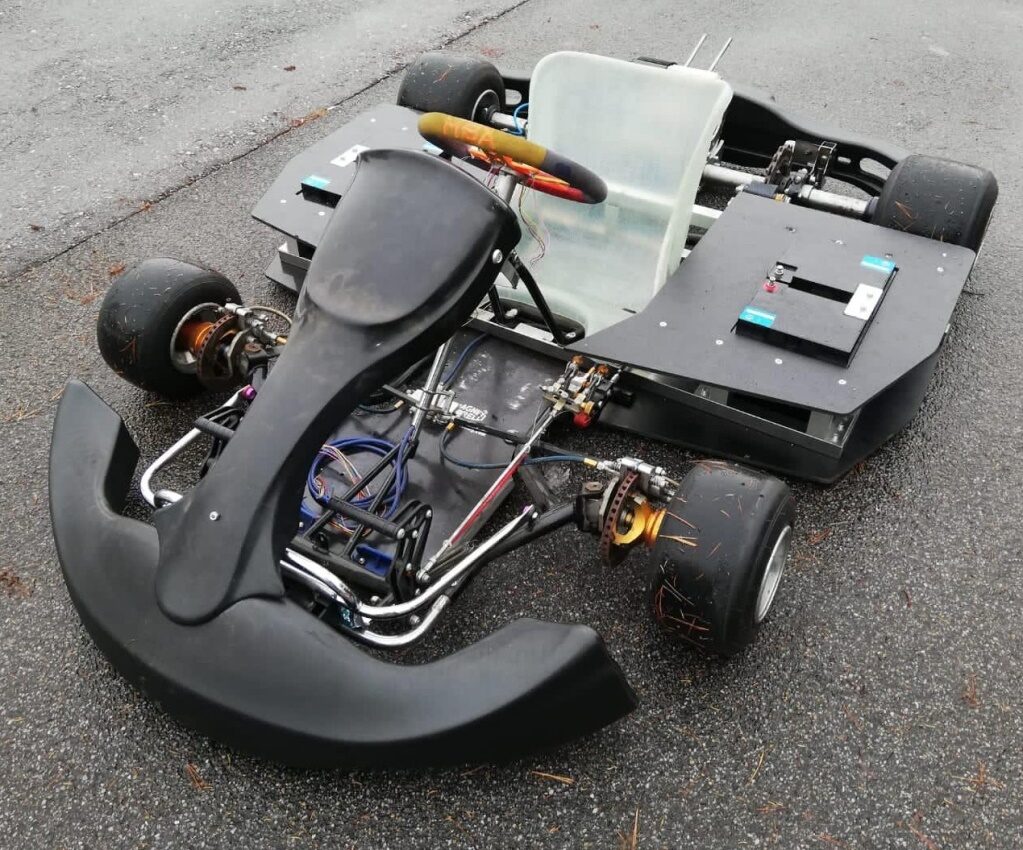
The idea
Take a used combustion go-kart chassis — kindly donated by Styria Karting — rip out everything that burns fuel and rebuild it as an electric kart… as efficient as possible. E-mobility was just exploding back then and it simply fit that two mechatronics students jump on it.
Here’s the starting point: A real petrol kart, yellow racing seat, exhaust, the full program — and a lot of it had to go:
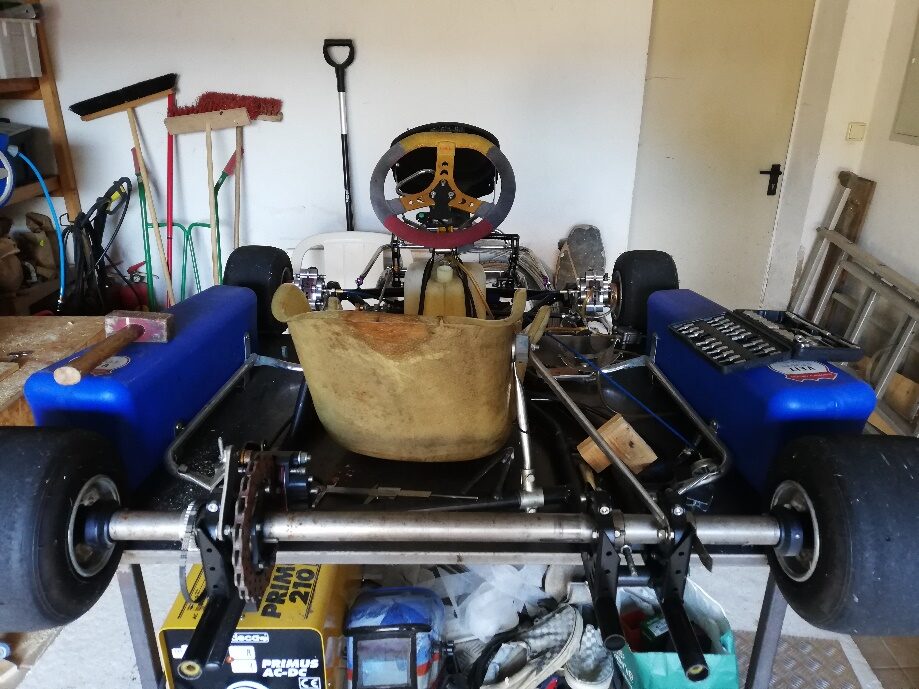
The work split into three areas:
- Mechanics — strip the frame (tank, old seat, brackets, everything out), then design and fabricate the new parts
- Electronics — power train + control electronics, from 48 volts down to the 5 V microcontroller
- Software — an Arduino, which supervises the whole thing + a controller from Golden Motors
The power side
- BLDC motor, ~5 kW at 48 V, air-cooled, driven by a 3-phase motor controller
- 4× lead AGM batteries in series → 48 V, 50 Ah
- 25 mm² copper cable for the power lines (that’s proper almost wrist-thick cable)
- A 150–200 A emergency-stop switch
- The driver’s speed request is simply an analog voltage signal from the pedal, which the controller reads and turns into motor power
Here’s the drivetrain, laid out on the floor — BLDC motor, rear axle, sprocket and chain, plus Philipp’s self-built motor mount:
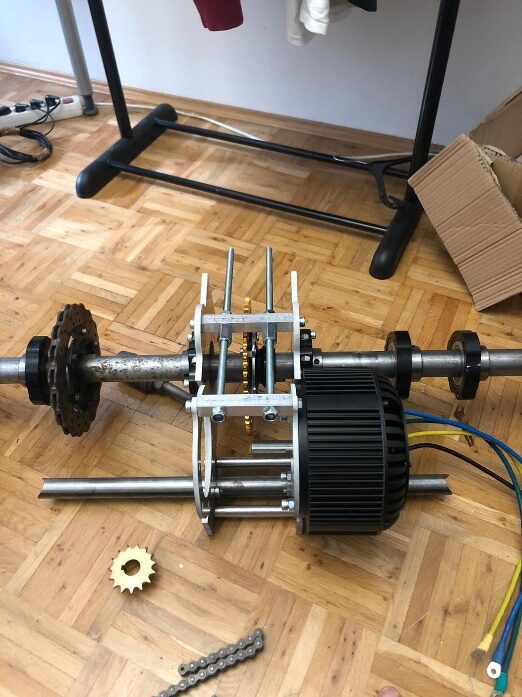
(Please note that the mount is designed so that a second motor could be mounted on the opposite side. Also the chain can easily be tensioned via the two threaded rods.)
Quick tangent on the batteries, we went with AGM lead instead of lithium on purpose (we wanted to solder cells together ourselves but our KV didn’t like that :( ). No BMS needed, leak-proof, shock-resistant, maintenance-free, low internal resistance — and above all relatively cheap at basically zero effort. Not the exciting choice, but the right one.
The motor controller itself gets programmed via a special BUS-to-USB adapter — that’s where you set the inrush current limit and the undervoltage cutoff, so the batteries don’t end up deep-discharged in an early grave. The motor also has a temperature sensor as overheat protection.
The brain: an Arduino Mega 2560
A DC/DC converter pushes the 48 V down to 12 V and feeds an Arduino Mega and the Mega runs the entire control layer. This is how everything talks to everything:
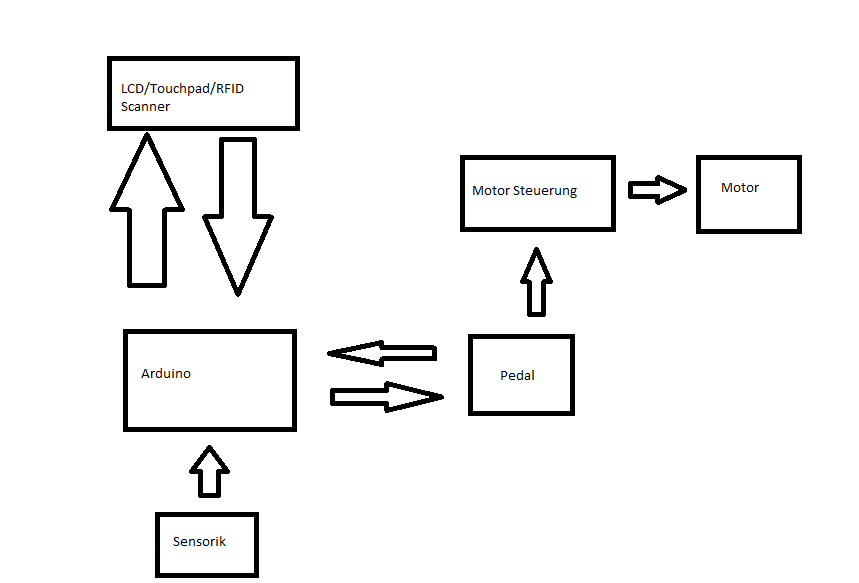
It does a lot more than “read pedal, go fast”:
- RFID immobilizer. An RC522 scanner and two registered chips, hard-coded in the sketch. No valid chip, no drive — the code keeps the e-lock, brake, forward/reverse and cruise-control relays de-energized until you scan in which blocks the pedal signal completely. Basically a DIY immobilizer.
- Forward / reverse and a cruise control toggle, with the brake sensor killing cruise instantly as soon as you touch the pedal.
- A Nextion touch display (NX4024T032) as the main HMI, plus a small 128×64 OLED with live RPM and km/h
- Battery voltage read via a voltage divider —
analogRead(A13) * 0.053116and yes, that magic number was found the honest way: just kinda calculated it back then… :,) - Speed/RPM via a sensor, which measures the time between pulses —
RPM = 60000 / cycleTimeDif— (shout-out at this point to Herr Zorn and Herr Merkus who on a weekday at 21:00 or so tried to help me because I didn’t get that adding a decimal written with . and a decimal written with , together leads to an error in the compiler…)
Actually building the parts
All the custom hardware — motor mount /chain tensioner, battery holder, seat holder, side panels and base plates — was Philipp’s department: milling, turning, waterjet cutting, then bolted, welded and fitted. The small stuff (screws, profile tube) we bought; the interesting parts we made ourselves. Here’s one of the waterjet-cut aluminium motor mount plates, fresh off the machine:
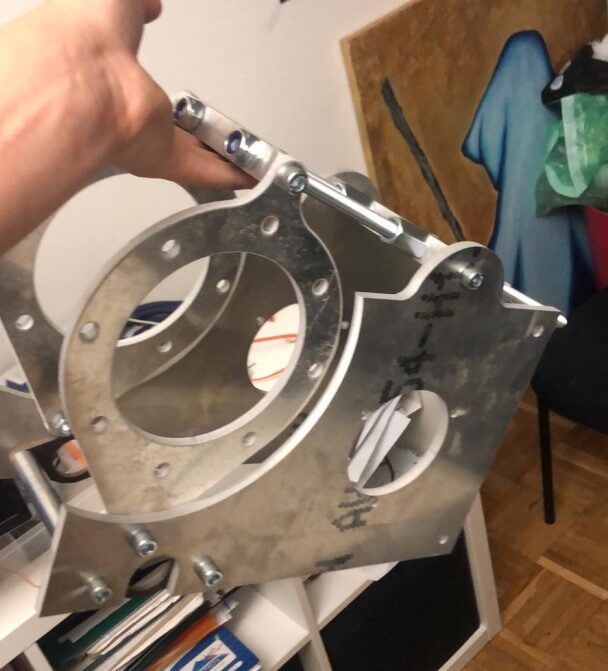
And here’s the kart mid-build — bare frame, the aluminium battery carrier bolted in, no bodywork yet:
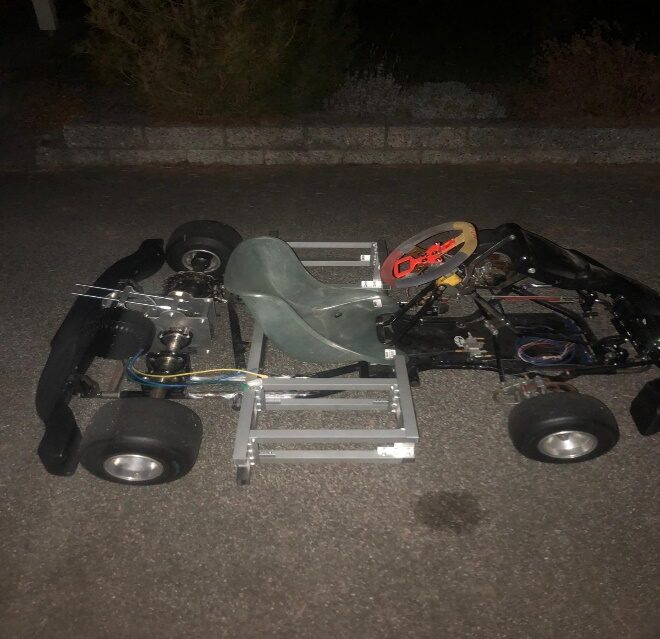
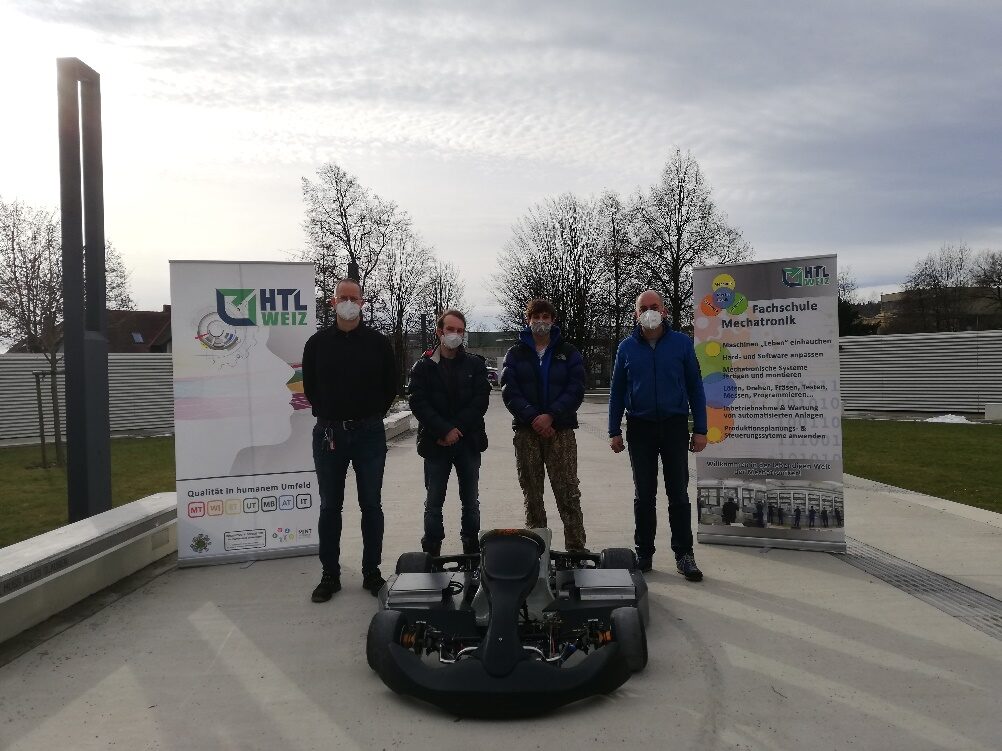
The whole thing ended up costing around 2000 - 3000 €, self-funded.
And then it went and won too
This kart — HTL Weiz I — drove at the very first official HTL Zero Emission Challenge, in November 2023 at the ARBÖ driving safety centre Ludersdorf. Brand new competition, traveling trophy and all, with HTL teams from all over Austria (plus a few Formula Student teams from TU Graz and FH Joanneum as guests). See here
Our driver was Marcel Wolf — one from the business branch (I think?) (not related) he simply had the same last name. Props to him, he maybe carried us a little.
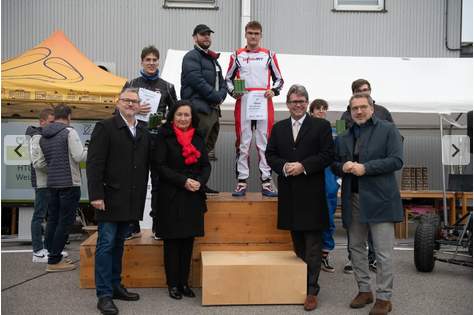
Three dynamic disciplines — skidpad, acceleration and slalom — plus a project presentation. And after the points tally:
- HTL Weiz I — 34 points (that’s us)
- HTL Weiz II — 33 points
- HTL Litec — 31 points
Overall win, ahead of the entire field and the traveling trophy was handed over by the education minister personally. not gonna lie — winning the very first edition of a competition with a kart that two people built is pretty nice :)
Looking back
Would I build it the same today? Definitely not — cleaner wiring, I’d take another look at lithium - now that nobody can forbid me, etc… . But for a first real electronics build it did everything it should: turned petrol into electrons, didn’t move a millimeter for strangers, showed how fast you’re going — and then it drove off and won.
Want something physical that thinks for itself:
Ready for your project?
Tell us what you're working on — we'll get back to you with practical next steps.
Get in touch